I have a number of PoE IP cameras outside the house and I have trialled budget brands including S3VC to more premium end Unifi G3-Pros.

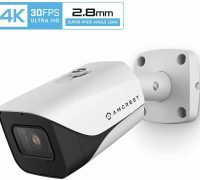
The AMCREST IP8M model had a deal on Amazon so I thought I’d give it a go. My video of the unboxing and quick install can be found HERE on YouTube but in short, for the money a really good camera and I was installed and away within 15 minutes.

You will need the default username and password of admin:admin to access the camera’s control panel. You will be prompted to change this when you login for the first time. From there everything is really intuitive and easy to follow.

RTSP path: rtsp://user:pwd@ip:port/cam/realmonitor?channel=1&subtype=0


Note you should add a new USER in the camera control panel and make sure it has read-only access to the live stream.

EASE OF INSTALL: 8/10. Demerits for a large hole needed for the RJ45 connector and redundant power connector. I also had to contact support for the RTSP path.

BUILD QUALITY: 9/10. Demerit as above.

IMAGE QUALITY: 10/10. Now also viewing at night the quality is good. The wide angle is great.

USER INTERFACE: 10/10. Very neat and has all the features I’d expect and more. I’m only scratching the surface of functionality and it looks like the camera is designed to join a much bigger eco system if you choose.

Whilst I am connecting this to Shinobi for CCTV monitoring, Amcrest provide a paid for cloud service and the admin control also appears to allow direct mounting for a NAS. I haven’t trialled these features yet.

I was debugging the traffic from one of my network devices that broadcasts each minute on multicast.

The following code was helpful to work through the output and why my python script wasn’t picking up the output any more.

tcpdump -nnXs 0 -i en0 udp port 22600 and dst 224.192.32.19

I was debugging some code/checking if a device was in fact broadcasting. This code listened and logged all outputs:

sudo tcpdump -n -c 100 multicast | perl -n -e 'chomp; m/> (\d+.\d+.\d+.\d+).(\d+)/; print "udp://$1:$2\n"' | sort | uniq

And to see the traffic:

sudo tcpdump ether multicast

I hadn’t noticed but my log directory was slowly growing. This is running on a digitalocean droplet.

Taken from: https://www.digitalocean.com/community/tutorials/how-to-use-journalctl-to-view-and-manipulate-systemd-logs

Deleting Old Logs

If you use the –vacuum-size option, you can shrink your journal by indicating a size. This will remove old entries until the total journal space taken up on disk is at the requested size:

sudo journalctl --vacuum-size=1G

Back to a healthier size.

I use the WordPress to Dropbox backup plugin on many of my WordPress installs and, up until I changed the setup to use PHP7, things were working great.

Thanks to the post from smowton over on the wordpress.org support channel, it is now working again.

The backup plugin was throwing errors in the logs about curl and an unexpected “overwrite” parameter. E.g.
Warning: curl_setopt_array(): Disabling safe uploads is no longer supported in /srv/users/mjburton/apps/mjburton/public/wp-content/plugins/wordpress-backup-to-dropbox/Dropbox/Dropbox/OAuth/Consumer/Curl.php on line 92

The fix is as follows:

All paths are relative to $YOUR_SITE_DIRECTORY/wp-content/plugins/wordpress-backup-to-dropbox.

In file Dropbox/Dropbox/OAuth/Consumer/Curl.php:
comment out the line:
$options[CURLOPT_SAFE_UPLOAD] = false;
(this option is no longer valid in PHP 7)

In file Dropbox/Dropbox/OAuth/Consumer/ConsumerAbstract.php: replace the test if (isset($value[0]) && $value[0] === '@') with if ($value instanceof CURLFile)

In file Dropbox/Dropbox/API.php: replace 'file' => '@' . str_replace('\\', '/', $file) . ';filename=' . $filename with 'file' => new CURLFile(str_replace('\\', '/', $file), "application/octet-stream", $filename)

This replaces the long-deprecated, now-disabled support for uploading files with “@/file/to/upload” with the replacement “CURLFile” class. Also a note to the author (and optional patch for the reader): check the return value for curl_setopt_array, as this was failing unnoticed, leading to confusing behaviour downstream.

I recently migrated a server from ubuntu to CentOS that ran my MRTG installation.

This guide was a quick port for the install install of MRTG, and then the previous configuration setup files worked out of the box.

http://www.cyberciti.biz/faq/centos-fedora-linux-multi-router-traffic-grapher-tutorial/

I ran out of space on a Ubuntu VM.

1) Add more space via VMWare. Reboot VM.
2) ‘fdisk -l’ to show the partitions on the disk
3) ‘fdisk /dev/sda’ and then
Type p to print the partition table and press Enter
Type n to add a new partition
Type p again to make it a primary partition
Accept the defaults for cylinder start and finish
Type w to save these changes
REBOOT
4) ‘fdisk -l’ to show the partitions on the disk
5) Add the physical volume to the volume group.
In my example:
vgextend /dev/mapper/server–vg /dev/sda4
6) Extend the logical group by the amount of space added.
In my example:
lvextend -L+20G /dev/mapper/server–vg-root
7) Resize the file system to use it
resize2fs /dev/mapper/server–vg-root

That should make the new space usable. In my case it did anyway. Down from 99% full to 46%.

I was recently setting up a test ESXi host with some spare hardware and ran in to an issue with ESXi 5.5.0 whereby I had 3.97G ram available (due to the video card using some RAM) and this was lower than the 4G requirement of ESXi.

I followed the guide at: http://community.spiceworks.com/topic/411970-installing-esxi-5-5-with-4gb-ram-memory_size-error to override this.

1. Boot from VMware ESXi 5.5;

2. wait for the “Welcome to theVMware ESXi 5.5.0 Installation” screen:

Image: //static.spiceworks.com/shared/post/0004/3520/index.jpg

3. Press Alt+F1 for enter console and login as ‘root’ (no password needed);

4. go to:

cd /usr/lib/vmware/weasel/util/

delete file:

rm upgrade_precheck.pyc;

5. remove readonly flags;

mv upgrade_precheck.py upgrade_precheck.py.def

cp upgrade_precheck.py.def upgrade_precheck.py

6. set permissions:

chmod 755 upgrade_precheck.py

7. open script in ‘vi’:

vi upgrade_precheck.py

8. type “/MEM_MIN_SIZE” to find the string “MEM_MIN_SIZE”, press “a” to enter edit mode. “(4 * 1024 – 32)” change to “(2 * 1024 – 32)”, press ‘ESC’ and then type “:wq” (save & exit);

9. look for the installer PID:

ps -c | grep weasel

10. kill the installer (PID = process number):

kill PID

The process installer process will run automatically (with modified config script).

Continue from “Welcome to theVMware ESXi 5.5.0 Installation” as usual.

I run MRTG to monitor my internal network stats:

http://www.mjburton.com/monitoring-network-traffic-with-mrtg/

However, I had been manually editing the cfgmaker produced file to show interfaces (ports) that were ‘down’ at the point of running the config maker.
I migrated to a new switch so, decided to read the manual.

cfgmaker --show-op-down .........

Works a treat and now all interfaces are displayed.

MRTG Stats

I’ve been having issues with /etc/resolv.conf resetting after a reboot or periodically. I set static IPs on the NICs but this wasn’t enough.

To fix it I:

nano /etc/resolvconf/resolv.conf.d/base

And put the relevant settings, e.g.

nameserver 192.168.1.XXX

Then, regenerate the resolv.conf file

resolvconf -u